Let’s get started by creating a basic Python program to ensure that your Python installation is working correctly.
Before we dive into programming, let’s discuss some effective organization practices. Rather than placing all your Python files in a single cluttered folder, it’s beneficial to create a structured system. Here’s how you can start:
- Folder Organization: Begin by creating a dedicated folder for your Python projects. For example, you can name it ‘Python’ or any other name that makes sense to you.
- Subfolders: Within your ‘Python’ folder, consider creating subfolders to categorize your projects. For instance, you’ve created a subfolder ‘1.1,‘ corresponding to the chapter or section number. You can organize your folders by date, by week, or by any other method that suits your needs.
A. Thonny
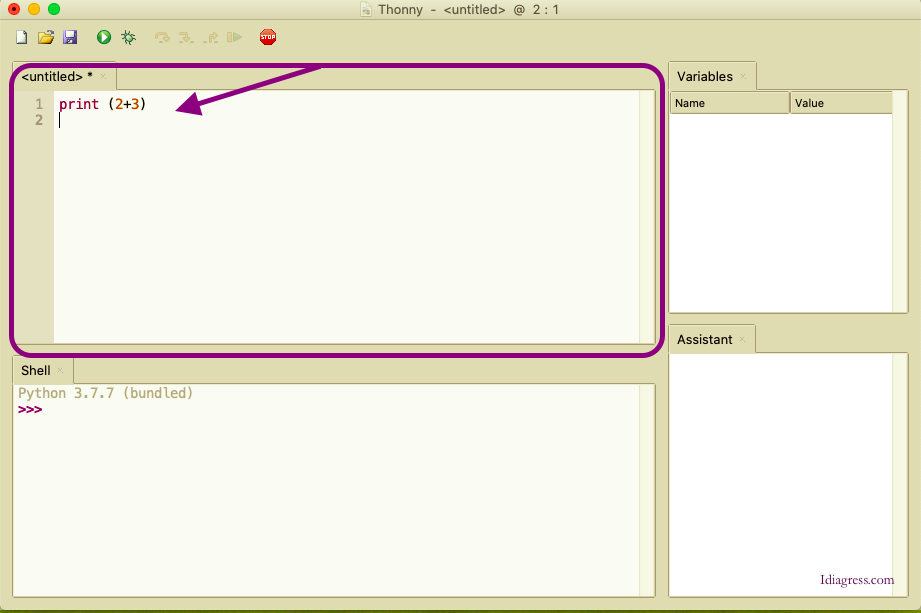
Let’s start a new session in Thonny, your Python development environment.
You’ll notice a fresh editor window materializing within the main window. This is where you can start typing your Python code. (Highlighted in the image)
- In the window highlighted, we will type a simple command.
print(2+3)
First, let’s save our file
- Go to the ‘File’ menu at the top of the Thonny window.
- Select ‘Save’ from the dropdown menu. You can also use the keyboard shortcut ‘Ctrl + S’ (or ‘Cmd + S’ on Mac).
- A dialog box will appear, allowing you to choose the location where you want to save your Python file. Navigate to the designated folder that you’ve created earlier, such as ‘Python/1.1,’ and select it.
- Now, provide a name for your Python file. It’s a common practice to give Python files the ‘.py’ extension, so you might name it something like ‘simple_program.py.‘
- After naming your file, click ‘Save’ in the dialog box to store your Python code in the designated folder.
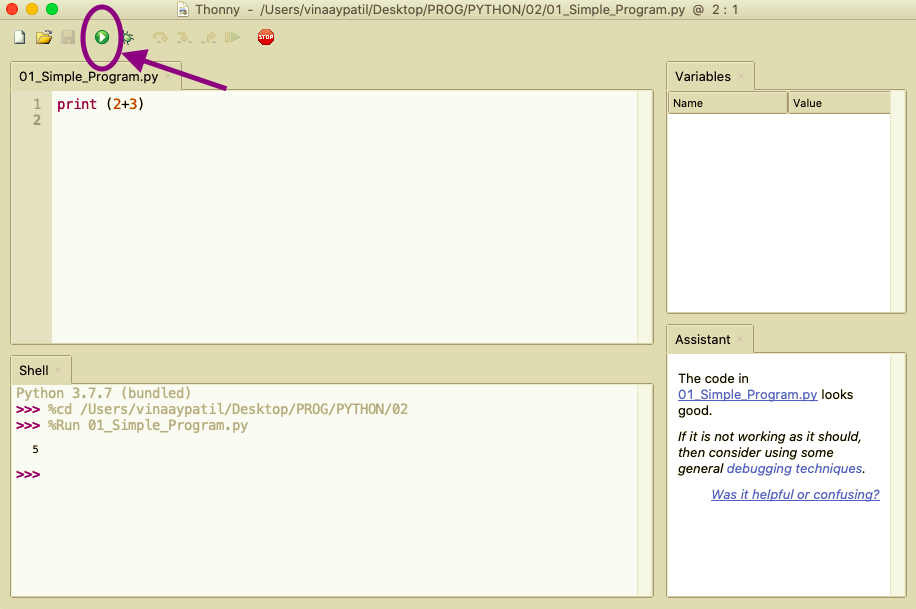
With your code safely saved, you’re ready to run it. Here’s how:
- Look for the green play button (usually represented by a triangle) in the Thonny interface. Click on it to execute your Python program.
- You should see the results of your code in the Thonny console, which is typically located at the bottom of the Thonny window.
In the Thonny interface, at the bottom, you will find two windows. Here’s an overview:
- Assistant Window (Bottom Right): The Assistant window provides valuable comments and feedback on your code. It can help you identify issues and improve your programming. For instance, it might currently say ‘the code looks good,’ which is a positive message.
- Shell Window (Below Main Window): The Shell window is where you’ll see the output of your Python programs. When you run your code, the results are displayed here. You can use the Shell to interact with your code and test various Python statements
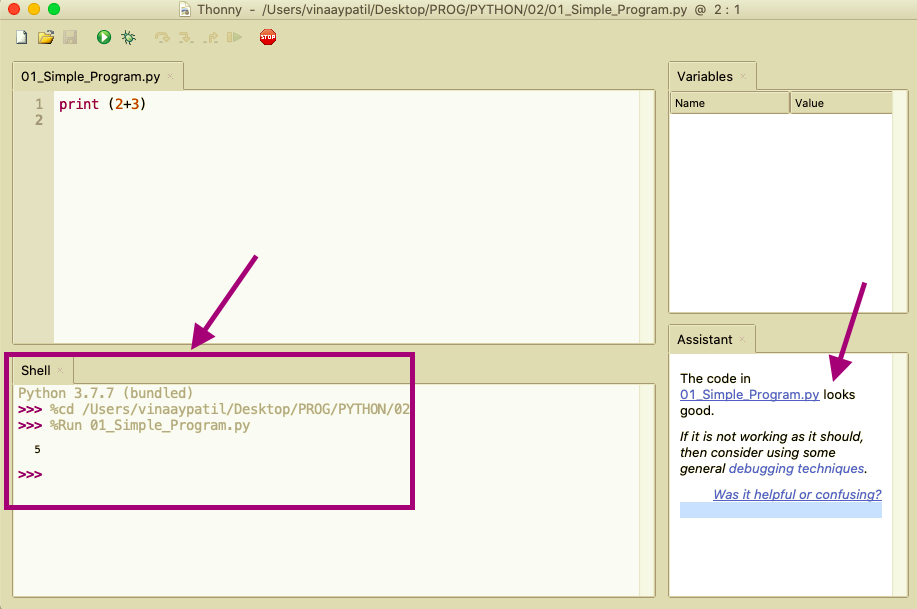
- The output is ‘5’ the output of ‘2+3’
In case you are unable to view the Assistant window or the Variables window, go to the
Top Pane —> View —> tick the options for Assistant and Variables.
B. Atom
- Launch Atom on your computer. If you haven’t already installed Atom, you can download and install it from the Atom website.
- Once Atom is running, go to the ‘File’ menu located at the top of the Atom window.
- From the ‘File’ menu, select ‘Add Project Folder.’ This action will allow you to associate your project folder with Atom.
- A dialog box will open, prompting you to choose a folder to add. In this case, select the ‘Python’ folder you created at the beginning of your project, which contains the ‘1.1’ subfolder.
- After selecting the ‘Python’ folder, click ‘Open’ or ‘Select Folder’ to associate it with Atom.
With your project folder connected to Atom, you’re now ready to create a new Python file:
- Go to the ‘File’ menu again.
- This time, choose ‘New File.’ A new tab will open in Atom with the title ‘untitled,’ where you can start typing your Python commands and code.
print(2+3)
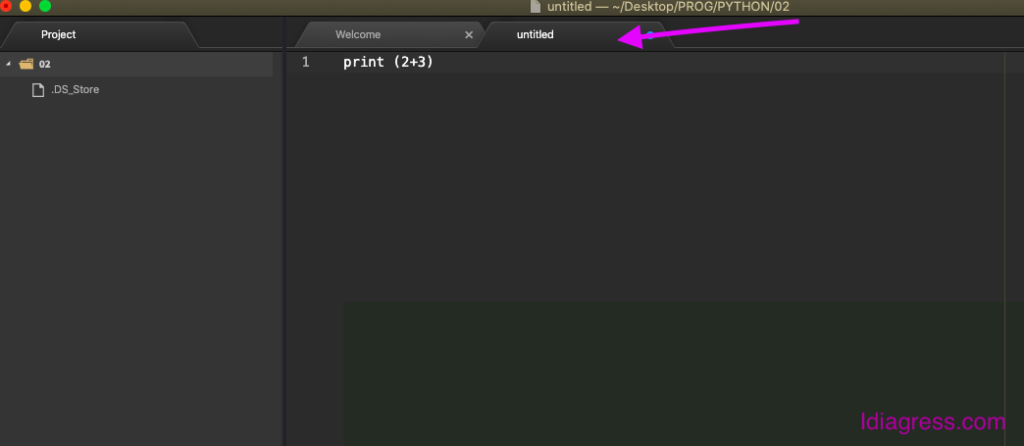
Once you’ve finished typing your Python code in Atom, it’s essential to save your work. Here’s how to do it:
- Go to the ‘File’ menu at the top of the Atom window.
- Select ‘Save.’ You can also use the keyboard shortcut ‘Ctrl + S’ (or ‘Cmd + S’ on Mac) to save your file.
- A dialog box will appear, allowing you to choose where to save your Python file. Since you’re creating a Python script, it’s a common practice to give it the ‘.py’ file extension. Let’s name the file ‘Simple_program.py.’
- After naming your file, click ‘Save’ in the dialog box to store your Python code as ‘Simple_program.py’ in your project folder.
With your code saved, you’re all set to edit, run, and manage your Python script in Atom. This organized approach to saving your Python files helps keep your projects well-structured and accessible for future use.
To Run the program, we have to initialize the ‘output terminal.’ For this, click on the ‘+’ sign in the bottom left corner
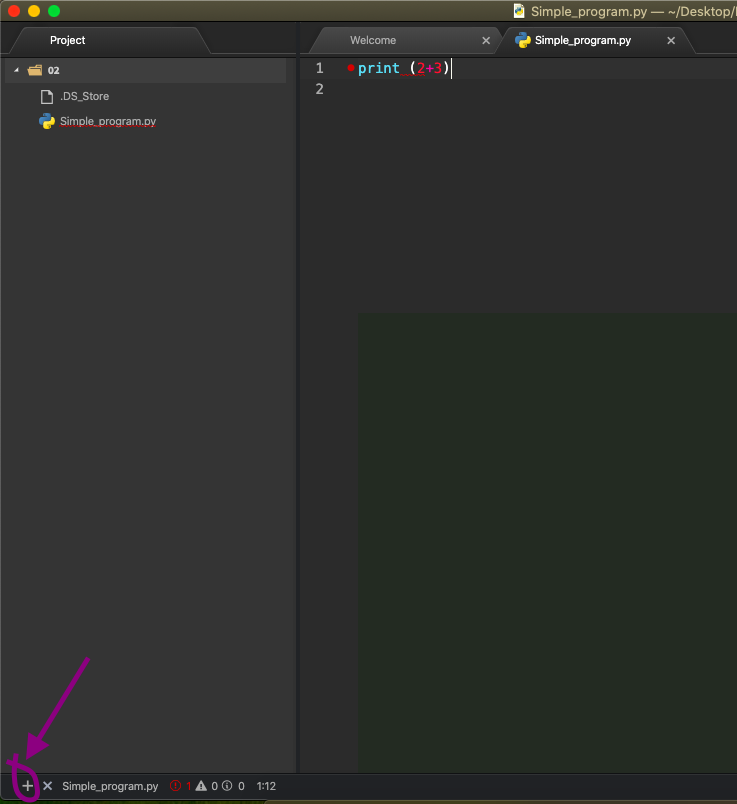
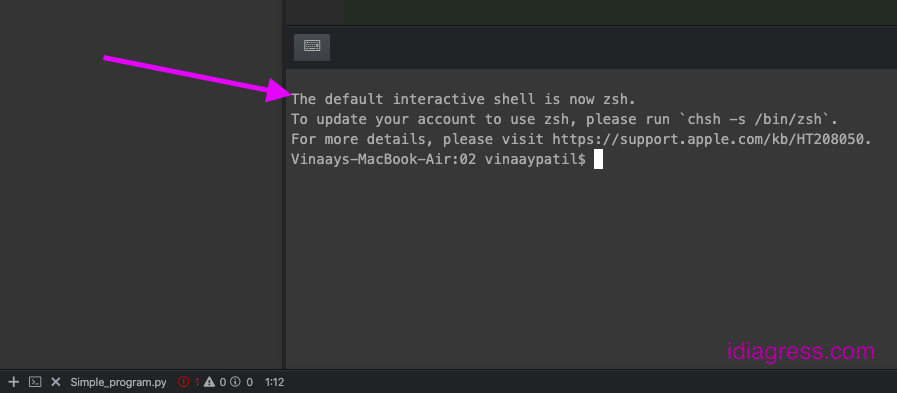
The ‘Terminal Window’ will open with an ‘Active Command Prompt.’
Once you’re in the correct directory, you can run your Python program by typing the following command in the terminal window:
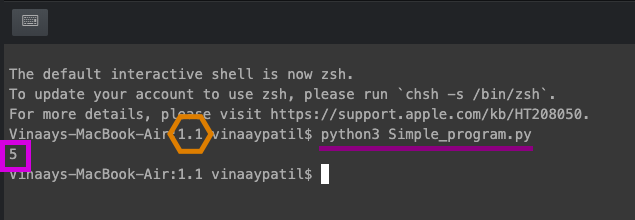
python Simple_program.py
Make sure to use the exact filename you saved, including the ‘.py’ file extension. In this case, it’s ‘Simple_program.py.’
Here are some helpful tips for running your Python program in the terminal:
- Auto-Complete: To save time and avoid typing the full file name, you can use the auto-complete feature available in the command prompt. Type the first few letters of the file name, for example, ‘Si,’ and then press the ‘TAB’ key. The command prompt will attempt to complete the file name for you.
- Output Display: The output of your program will be displayed in the rectangular area, often called the console or terminal. In your image reference, it’s labelled as ‘5.’
- Folder Name in Command Path: If your program fails to run, it’s important to check if the folder name appears in the command path. In your image reference, it’s highlighted (hexagon) as ‘1.1’ If the folder name is missing, you might have overlooked Step 1, which involves navigating to the correct directory in the terminal
- While Python itself is not case-sensitive, file names are case-sensitive when running programs in the terminal. Be vigilant about the use of uppercase and lowercase letters in your file names to ensure your programs execute correctly
- If you observe, I have used the command ‘python3’ instead of only ‘python.’ This is because I have multiple versions of Python installed on my system; hence I need to specify the version.In case you have a single install, then simple ‘python’ command is sufficient. For Mac OS, earlier versions of Python come embedded in the OS itself, so you will have to use the ‘python3’ syntax




[…] Homepage Next Chapter […]
[…] before you proceed with this chapter, you need to know how you can run a basic program in python, ei… […]